Singapore
 Thailand
 Indonesia
Option 1: Connect Your Instagram Account To Creator Studio Without A Facebook Page
Step 1: Go to Creator Studio.
Step 2: Click  located next to
  at the top of your screen.
Step 3: Follow on-screen instructions to log in to Creator Studio with your Instagram username and password.
Take note: If you’re having trouble connecting your Instagram account, and are asked to link to your account to a Facebook Page, you might need to do 1 of 2 things stated below:-
- Sign out of your Facebook user profile, and then log in to Creator Studio using your Instagram username and password.
- Go to Creator Studio from a private or Incognito browser, and then log in to Creator Studio using your Instagram username and password.
Option 2: Connect Your Instagram Account To Creator Studio With A Facebook Page
Step 1: Go to Creator Studio.
Step 2: Click located next to at the top of your screen.
Step 3: Next, it depends on the relationship between your Instagram accounts and Facebook Pages.
- If you manage a Facebook Page that’s already connected to the Instagram account that you want to use in Creator Studio, click to connect to that Page.
- If you don’t already manage a Facebook Page that’s connected to an Instagram account, click Connect to Instagram. Then, follow the instructions to log in to the Instagram account that you want to connect to.
- If you manage a Facebook Page that’s connected to an Instagram account, but want to use a different Instagram account that you don’t see listed, click Connect another Instagram account and follow the instructions.
- If you have multiple Instagram accounts already connected to your Facebook Page or Pages and want to manage them in Creator Studio, click Continue with connected accounts.
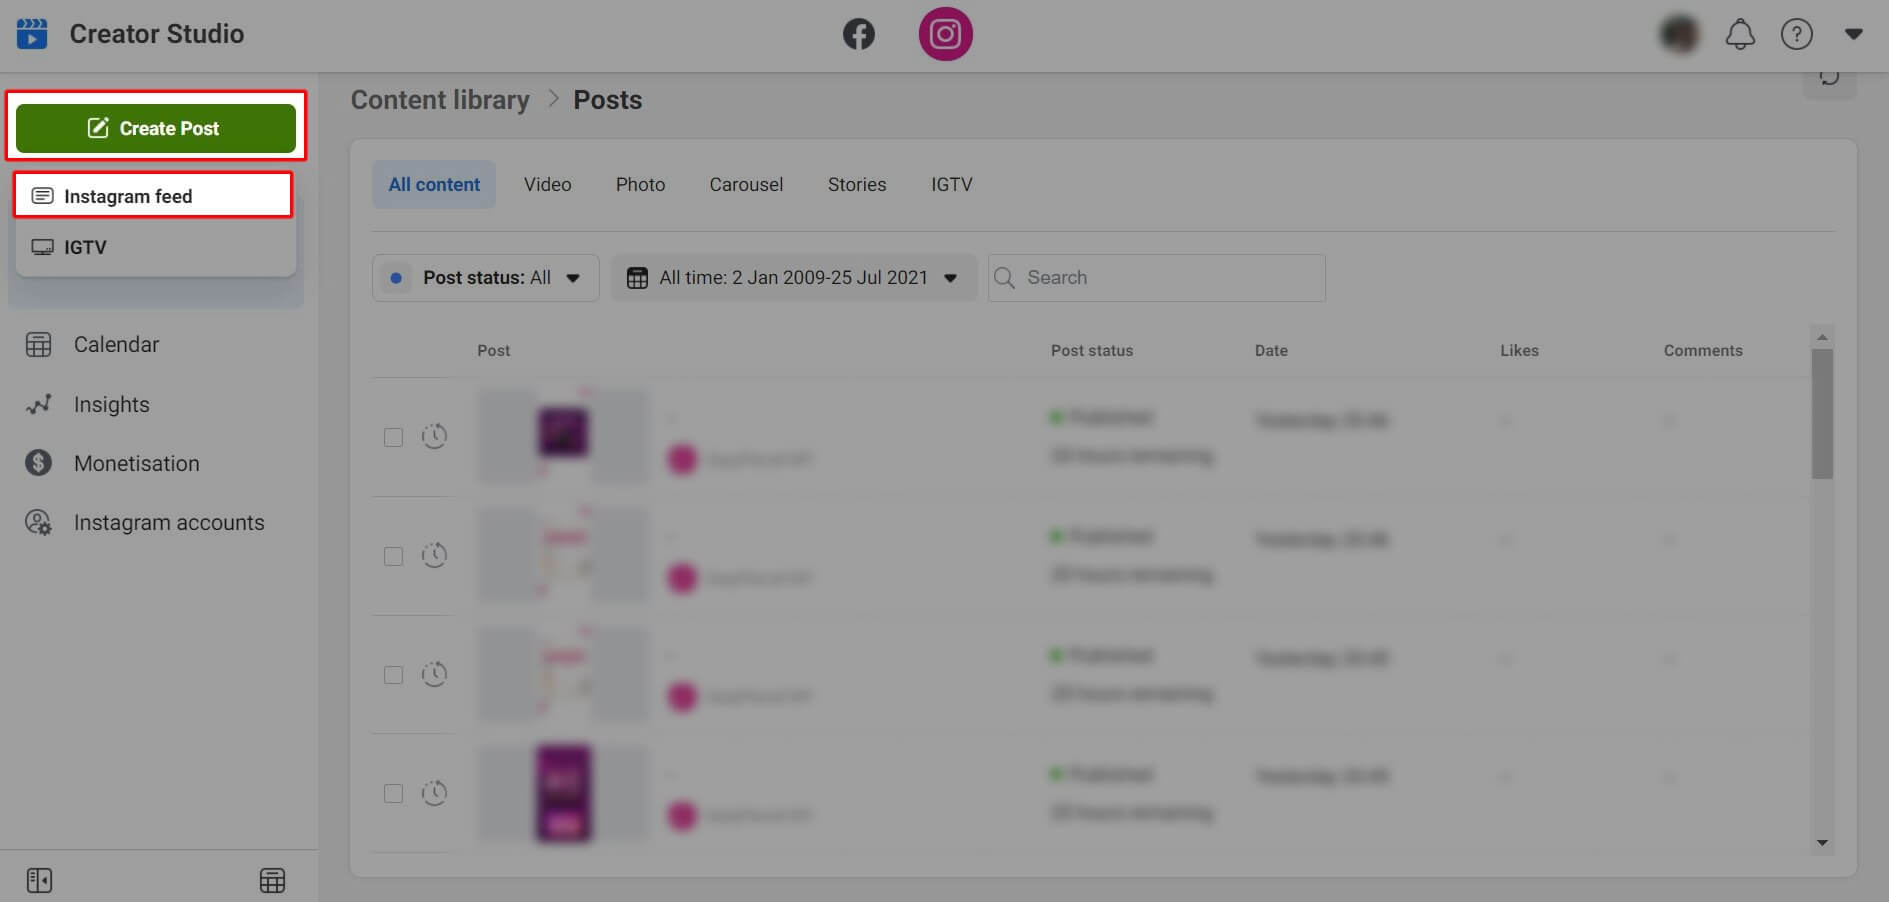
Step 1: Go to “Create Post” and click on “Instagram feed”.
Step 2: Choose an Instagram account which you want to create a post.
Step 3: Enter the caption, the content, video(s) or image(s), the location and choose if you wish to make the same posts on Facebook. Of course, you can schedule, backdate, post now or simply save as a draft your Instagram post.
Step 4: If you click on “advanced settings” on the top right of your screen, you will see interesting additional options for your Instagram Feed post, such as turn off comments and tag a business partner.
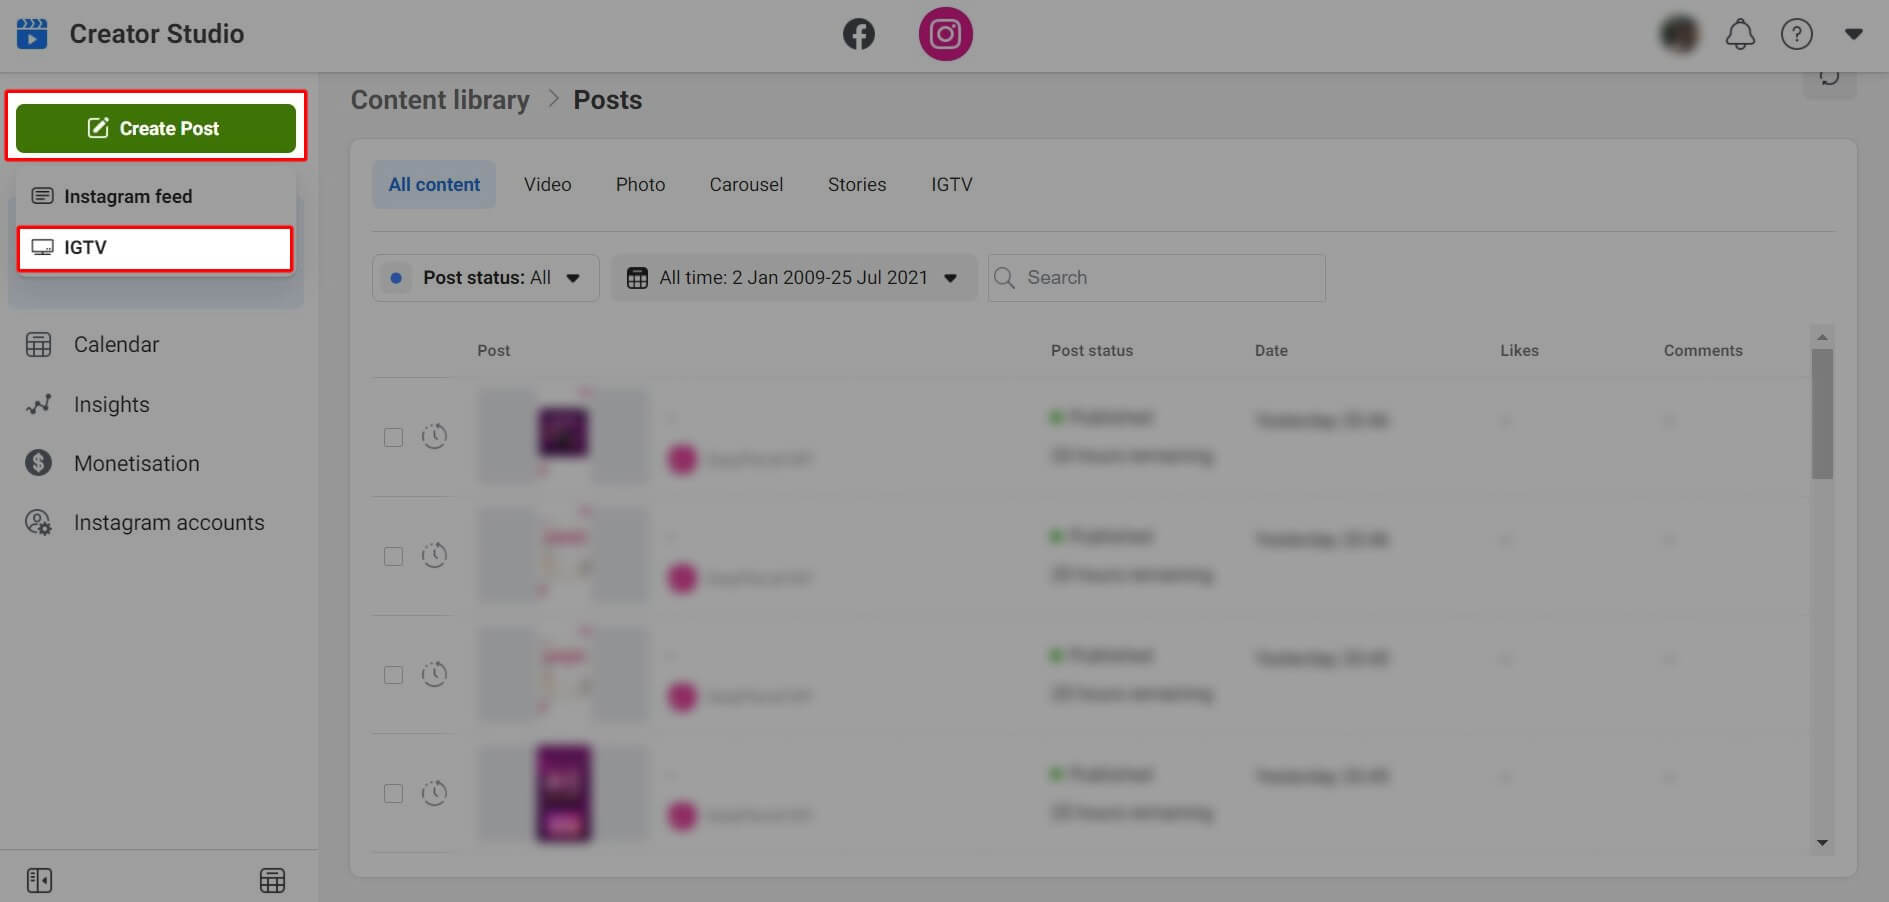
Step 1: Go to “Create Post” and click on “IGTV”.
Step 2: Choose an Instagram account on which you want to create a post.
Step 3: Upload a file or choose from your Facebook page’s content. You can also add a title of maximum of 75 characters as well as a description of maximum 2200 characters, 30 mentions and 30 hashtags.
Step 4: Add a cover image and select your Facebook page if you want the content to appear on the page. Of course, you can schedule your post or even edit it after it’s being posted.
#2 – Manage Your Content
The Instagram content library is where you can find all the posts you’ve ever made. You can find them super easily with multiple filters and tabs. It looks like the image below.

Step 1: Go to Creator Studio and click on “Content Library”.
Step 2: At here, what you can do are:-
- Select posts for a list of all of your selected page’s posts.
- Find posts that you want to edit or delete.
#3 – View Your Contents
This section is, well, a calendar that includes all of your published and scheduled posts. You can switch between a weekly and monthly view. When you click on a post, you will see a breakdown of its performance – that’s it!

#4 – Understand More About Activity & Audiences
To gain access to this section, all you need to do is click on the “Insight” tab on the left menu of your screen. You would then see 2 options: “activity” and “audience”. This is where you can gain insights on your Instagram account for the past 7-30 days.

Under the activity tab, you’ll see 2 graphs:
- Interactions – you’ll see the actions people have taken from your Instagram account such as calls, emails or website visits.
- Discovery – you’ll see the number of impressions and reach your account received in the past 7-30 days.
Under the audience tab, you’ll see:-
- Information such as the age, gender, location and favourite time of the day of your audience.
- The time where you’ll get the most interactions.
- Locations of your audience in terms of countries, cities and so on.
It’s important to know who relates most to you in order to adapt your marketing efforts.
#5 – Manage Your Monetisation
The Monetization tab in Instagram Creator Studio only includes the Brand Collabs Manager. If you meet the eligibility criteria, you can use this tool to streamline working with brands, manage your portfolio and content briefs, and export the results of brand collaborations.
Brand Collabs Manager is available to Instagram creators who:
- Have public, active Business or Creator accounts
- Have over 10,000 followers
- Have generated 100 hours of watch time on original videos or 1,000 combined engagement (likes and comments) in the last 60 days
- Are based in the U.S.
- Have no history of content violations