If you’re using an EasyParcel Next Gen account, then you’re in for a treat — because QuickSend 3.0 is here to make your parcel booking faster and easier now . Whether you’re sending one parcel or hundreds, this upgraded version will save you time and keep everything organised in one place.
In this blog, we’ll show you how to use QuickSend 3.0 step-by-step, so you’ll know exactly how it works.
Contents
What is QuickSend?
QuickSend is a tool in EasyParcel that makes sending parcels easier. With QuickSend 3.0, sellers can create an order form and share the link with their customers. Customers just fill in their delivery details in the form, and all the info goes straight to the seller’s EasyParcel account.
This means sellers don’t have to type everything themselves — saving time, avoiding mistakes, and making the process faster.
💡 Example: If you sell on TikTok, just send the QuickSend form link to your customer . Once they fill it in, you can book the delivery in a few clicks.
How QuickSend 3.0 Will Help You?
- Saves time – no more typing customer details one by one.
- Faster booking – all details go straight into EasyParcel, ready to ship.
- Reduces mistakes – customers fill in their own info
- List ItemStore integration – auto-import orders from Shopee, Lazada, TikTok Shop
- Simple sharing – send form link to customers via WhatsApp, IG, or FB.
Simple Steps: How to Use QuickSend 3.0 in Next Gen Account
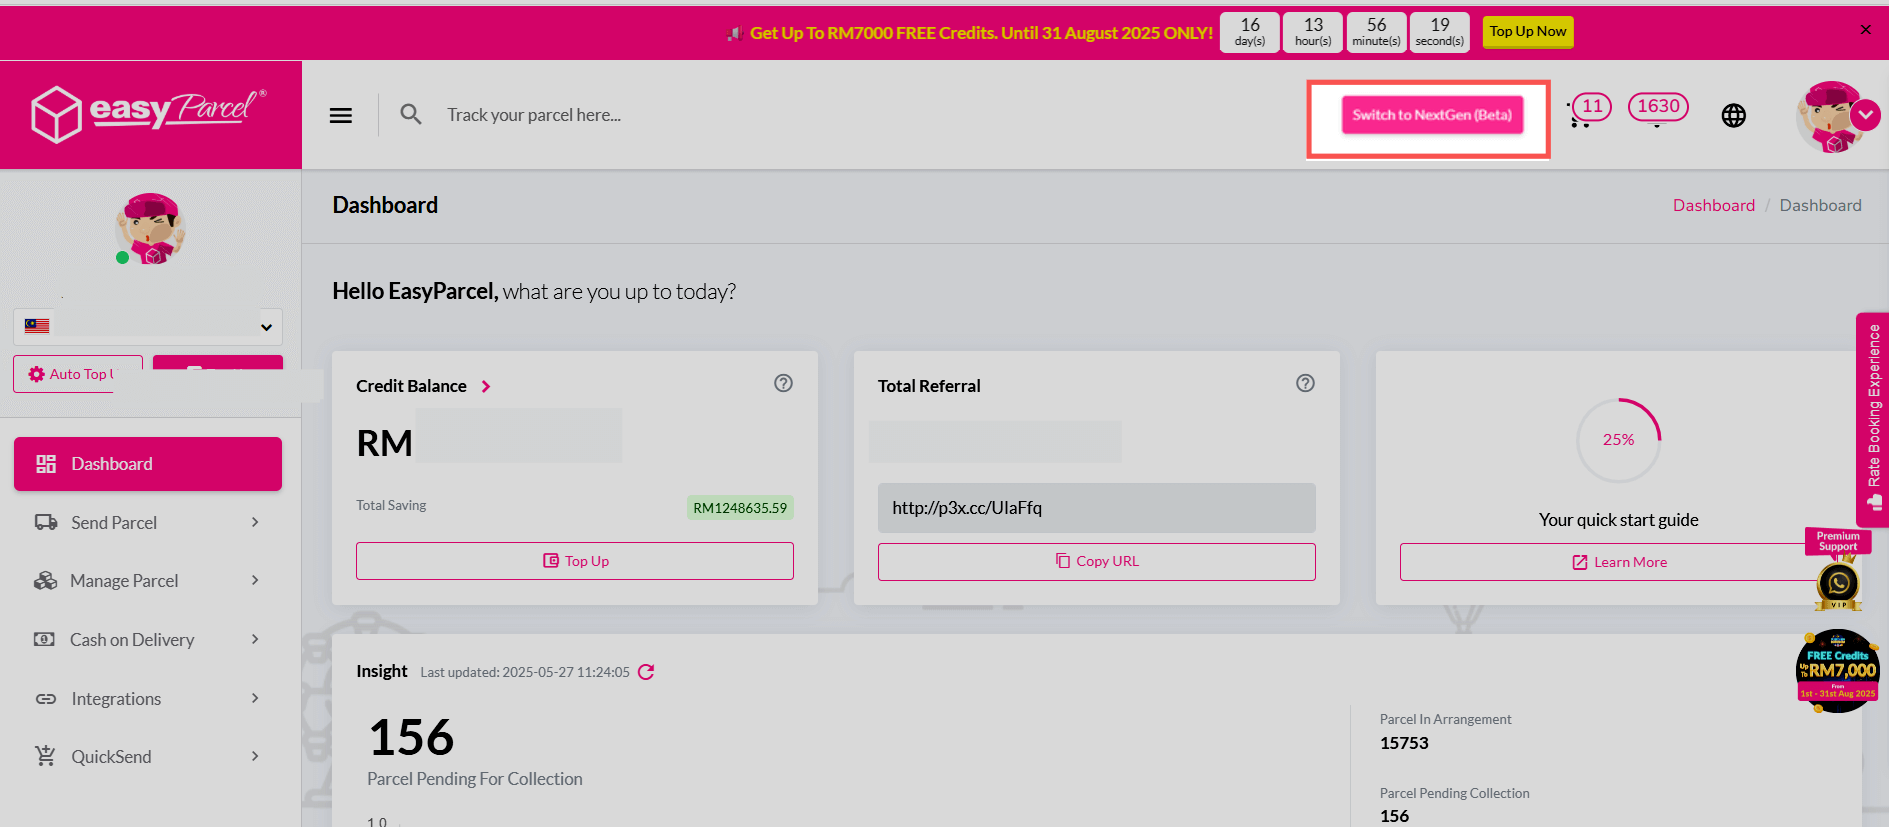
Step 1: Switch to Next Gen Version
Before using QuickSend 3.0, make sure you’re in the Next Gen interface.
- Go to the top right corner of your EasyParcel dashboard.
- Click the switch option to change from the Classic version to Next Gen.
💡 Tip: The Next Gen layout is more streamlined and loads super faster — so perfect for bulk orders.
Step 2: Access QuickSend
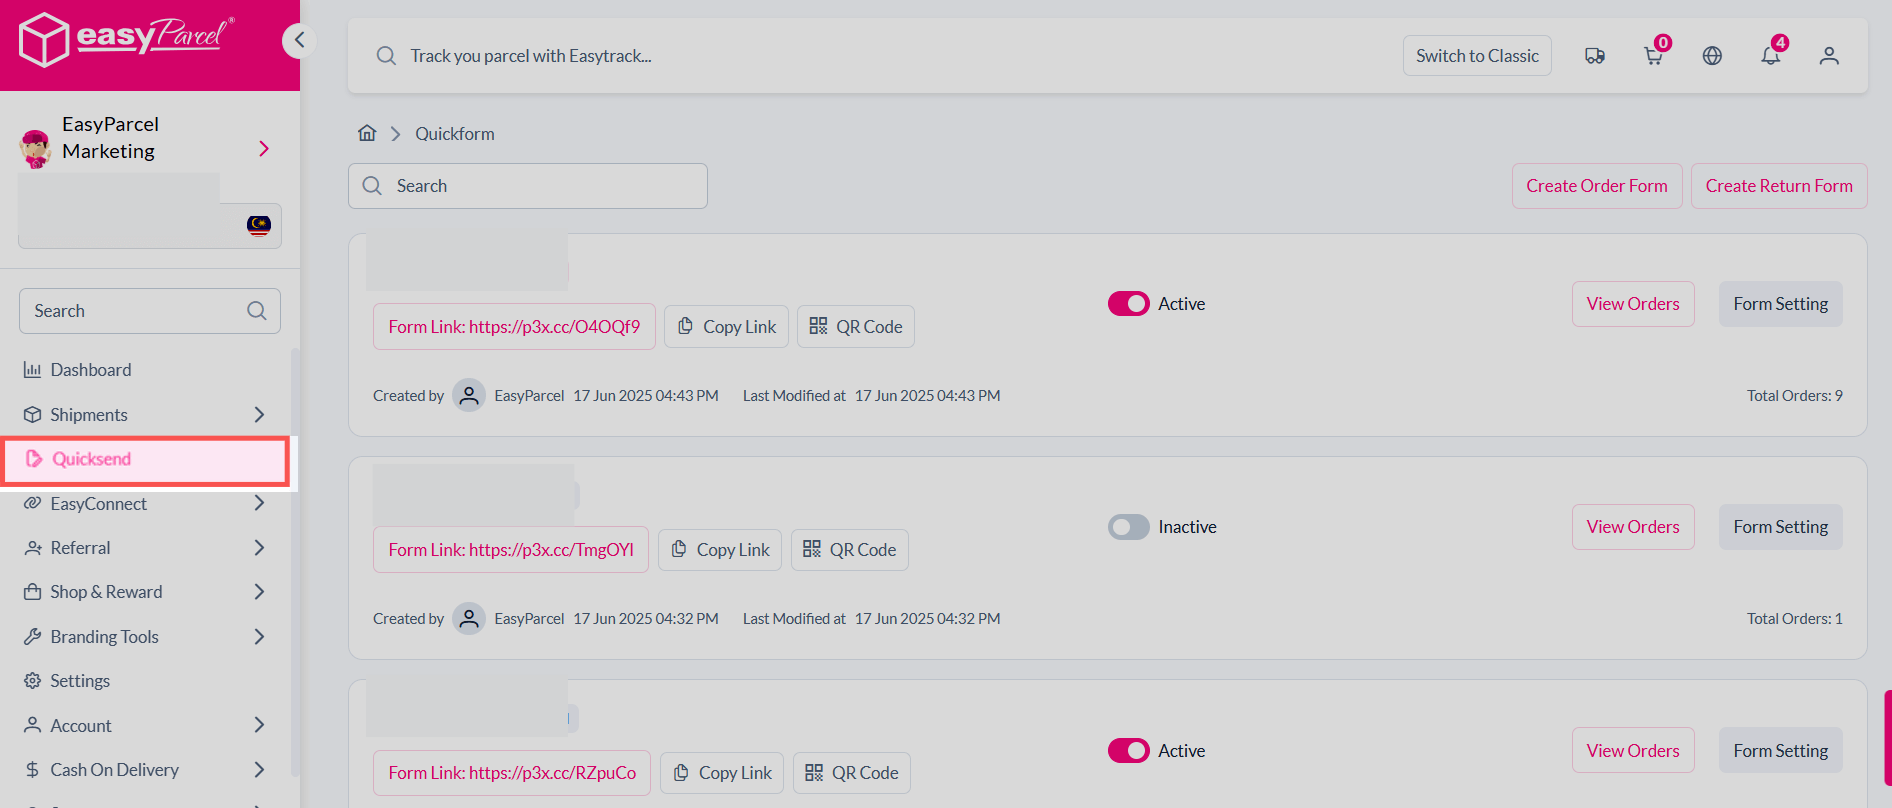
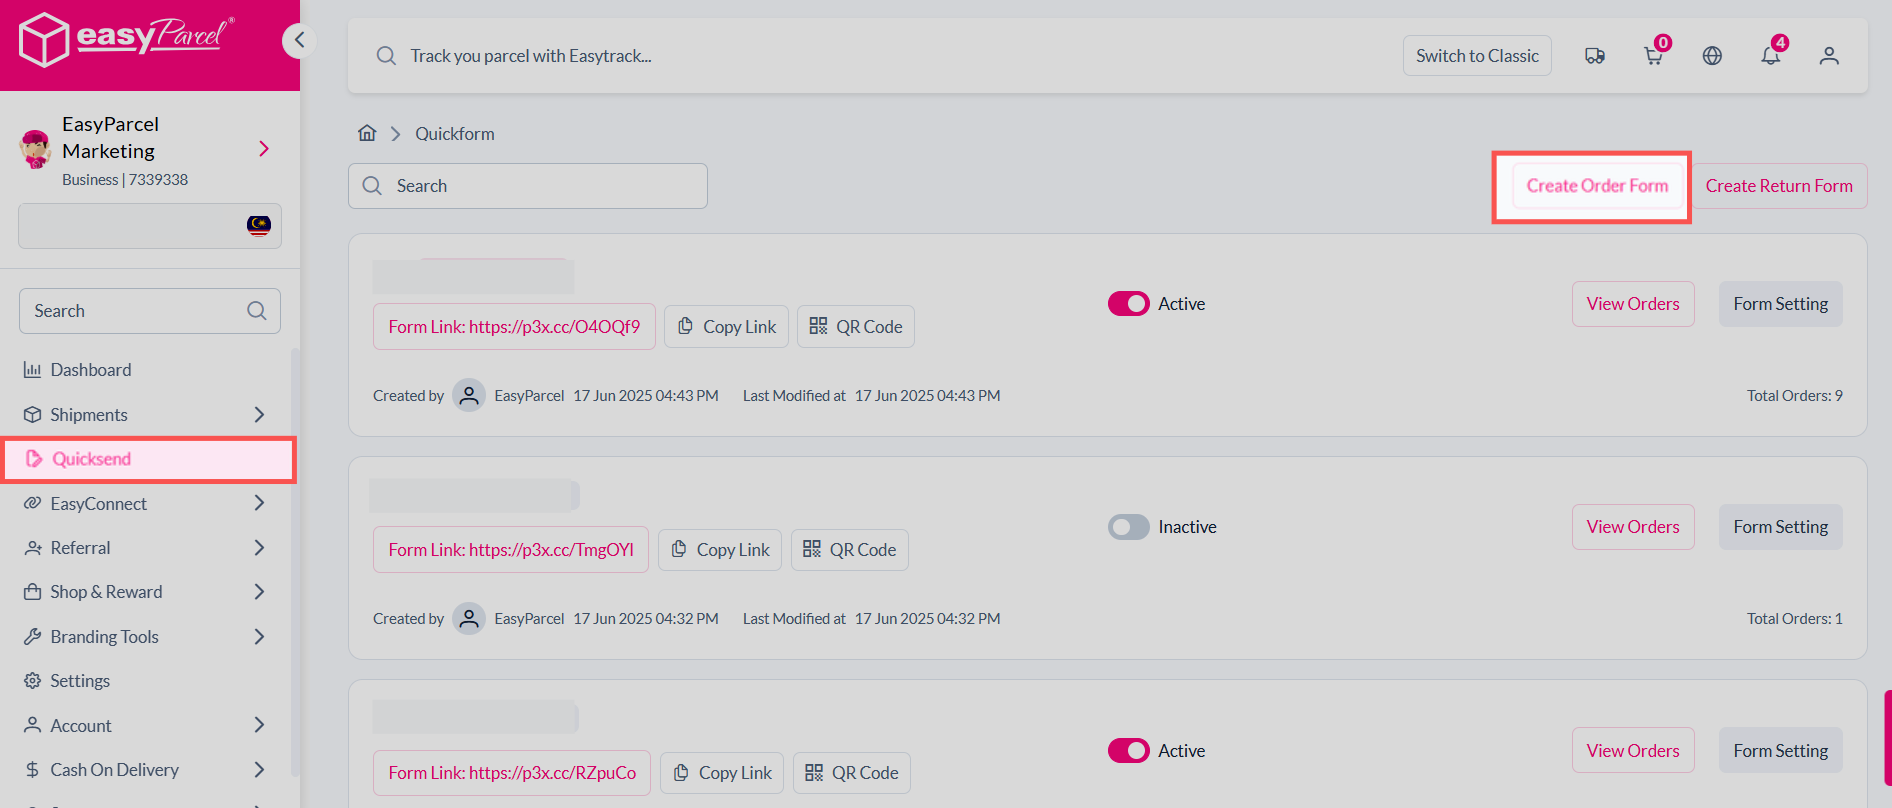
- Once you’re in Next Gen,go to the ‘QuickSend’ option on your dashboard menu.
- Click it to open the QuickSend main page.
Step 3: Create a New Order Form
- Click the “Create Order Form” button.
- You’ll be taken to a form with 5 main steps:
- Form Information
- Store Details
- Product Setup
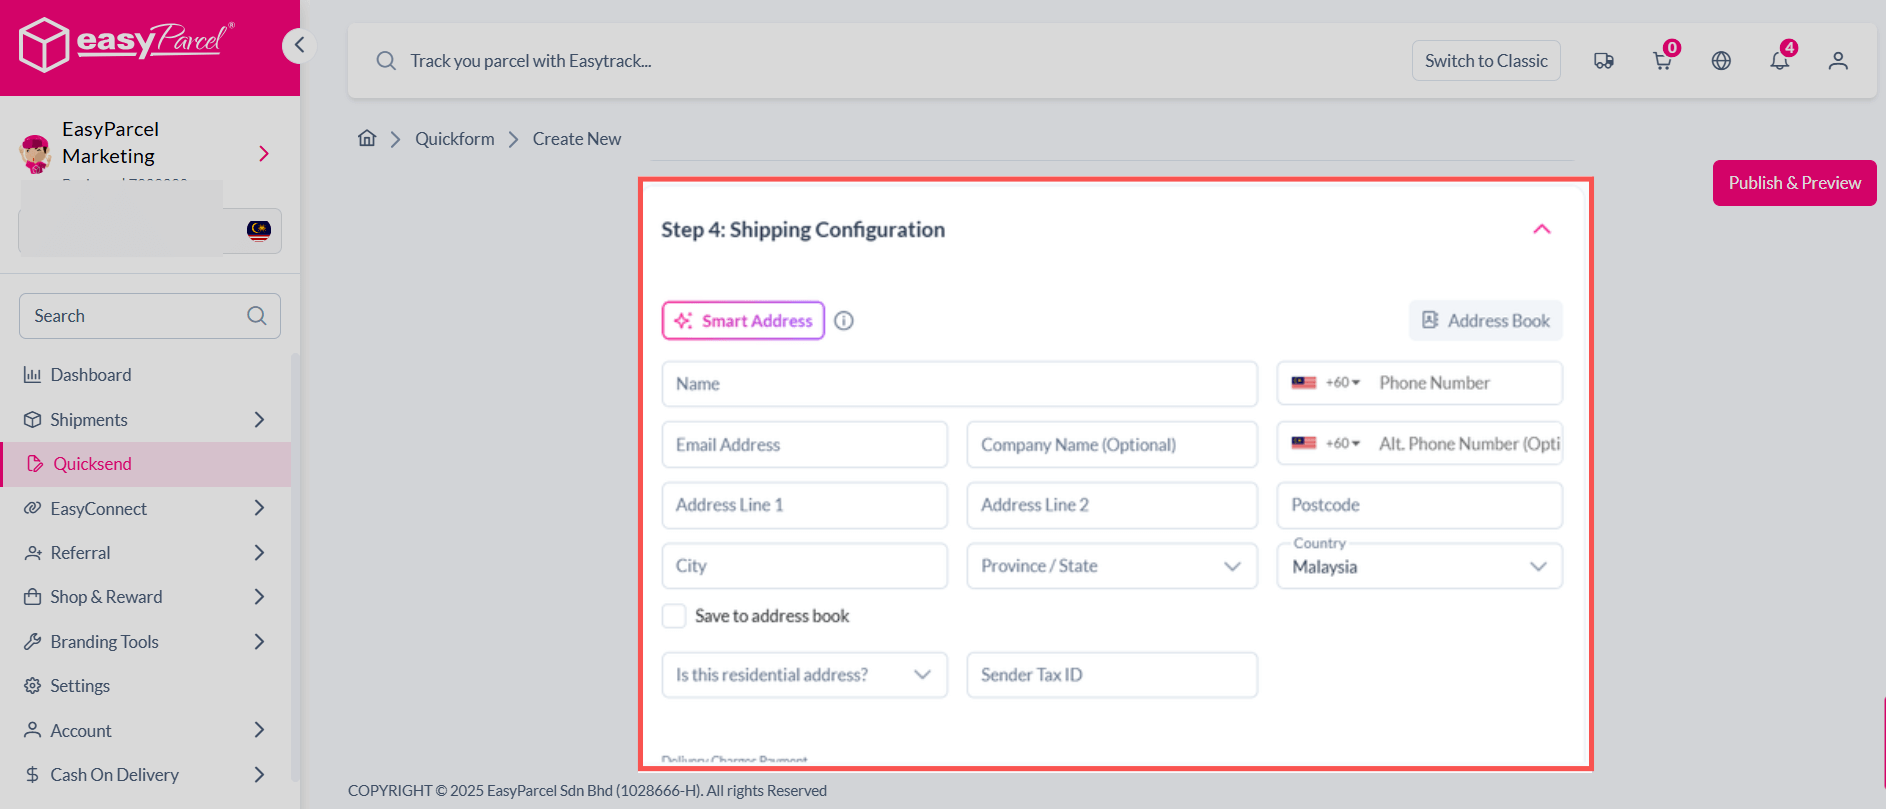
- Shipping Information
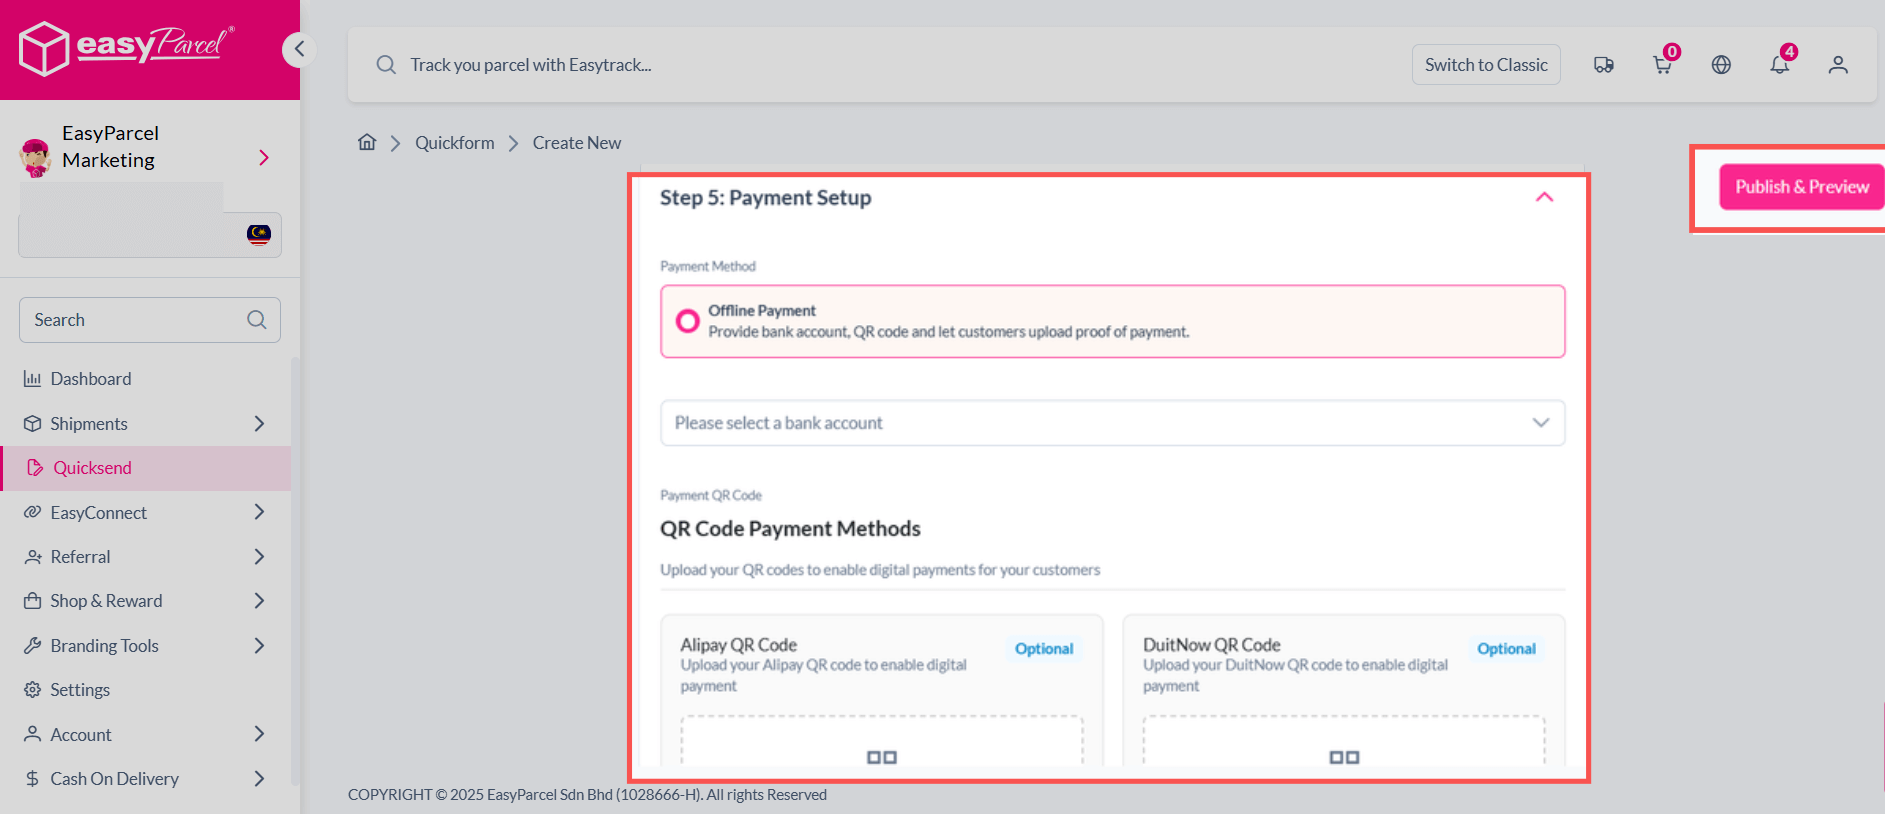
- Payment Method
Step 4: Fill in Form Information
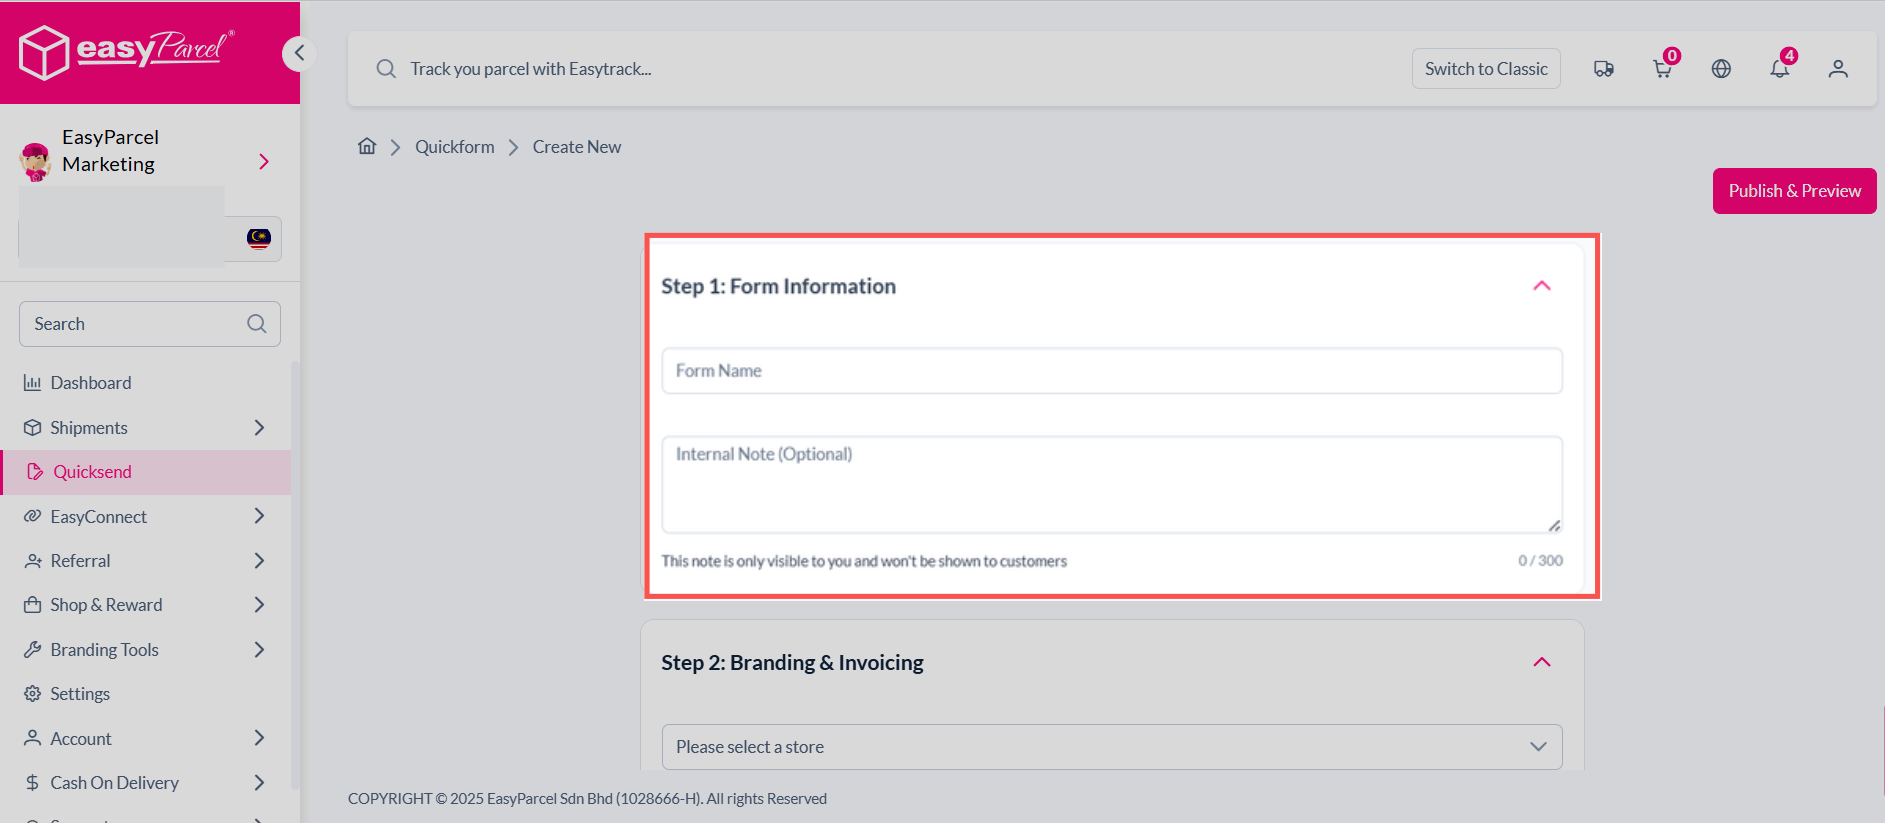
This is Step 1 of your QuickSend order.
- You need to Fill in the Form Name (e.g., “Shopee Orders August” or “Weekly Parcel Batch”). and Internal Note( e.g., Add any notes for your own tracking, such as promo codes used or customer group.)
📌 Internal notes are for your reference only and won’t be shown to your customers.
Step 5: Store Details & Product Setup
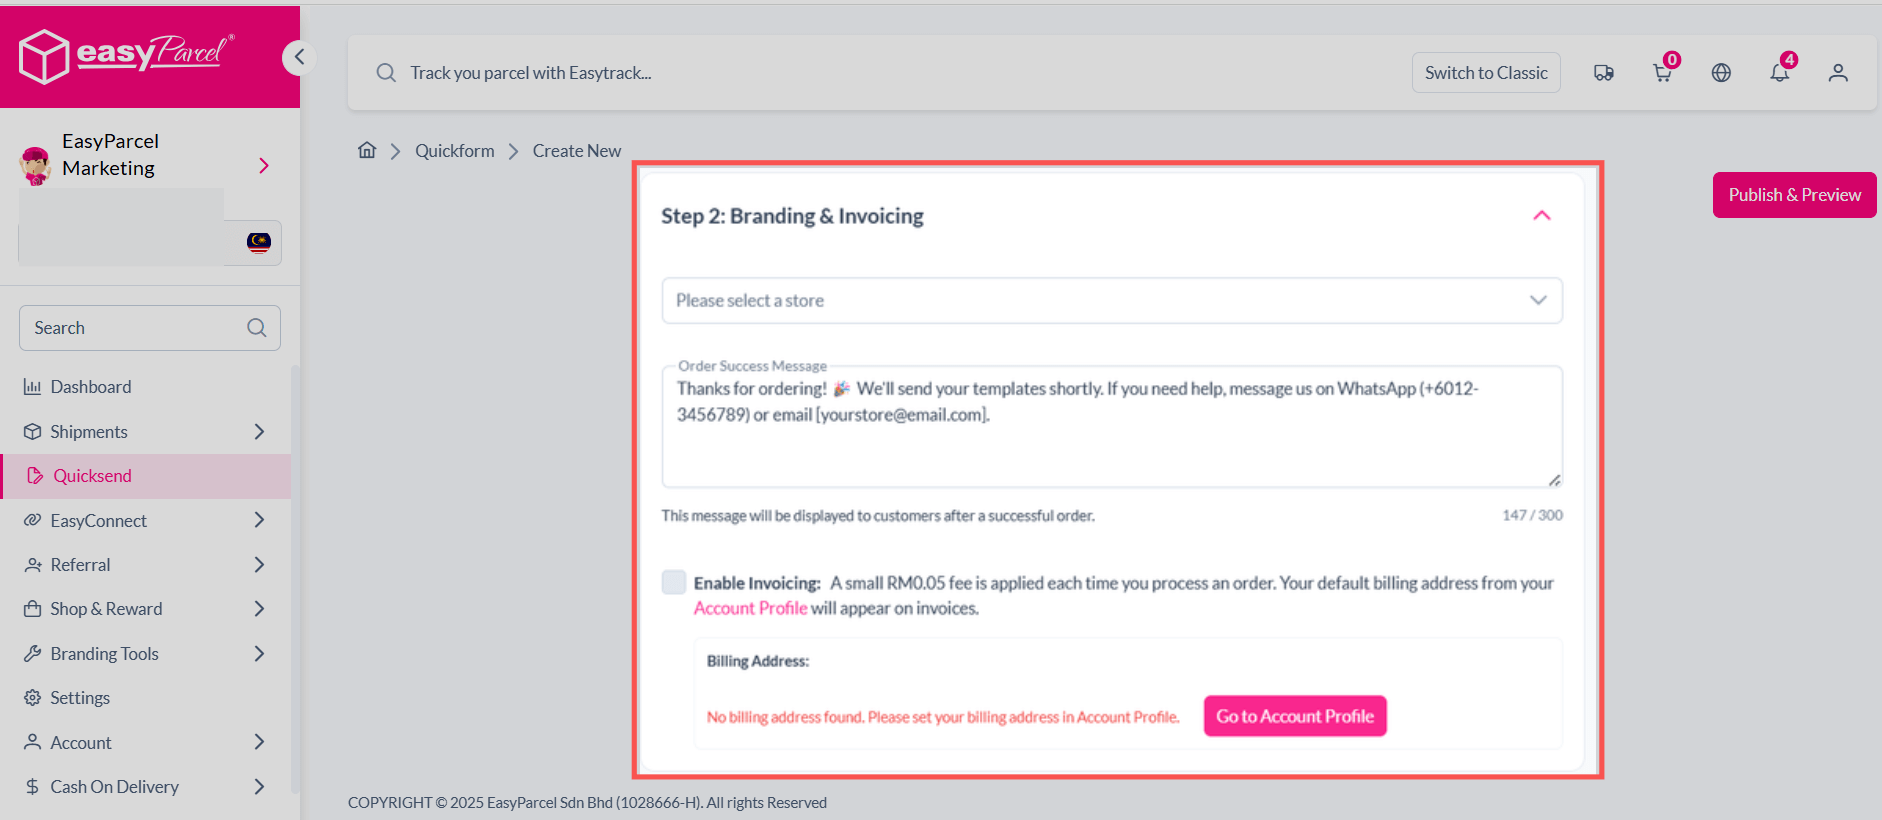
Store Details
- Go to EasyConnect and pick your store (Shopee, Lazada, TikTok Shop, etc.).
- Select the correct store name.
- Make sure it’s linked in “Integration” settings.
💡 Linking your store lets QuickSend pull orders automatically.
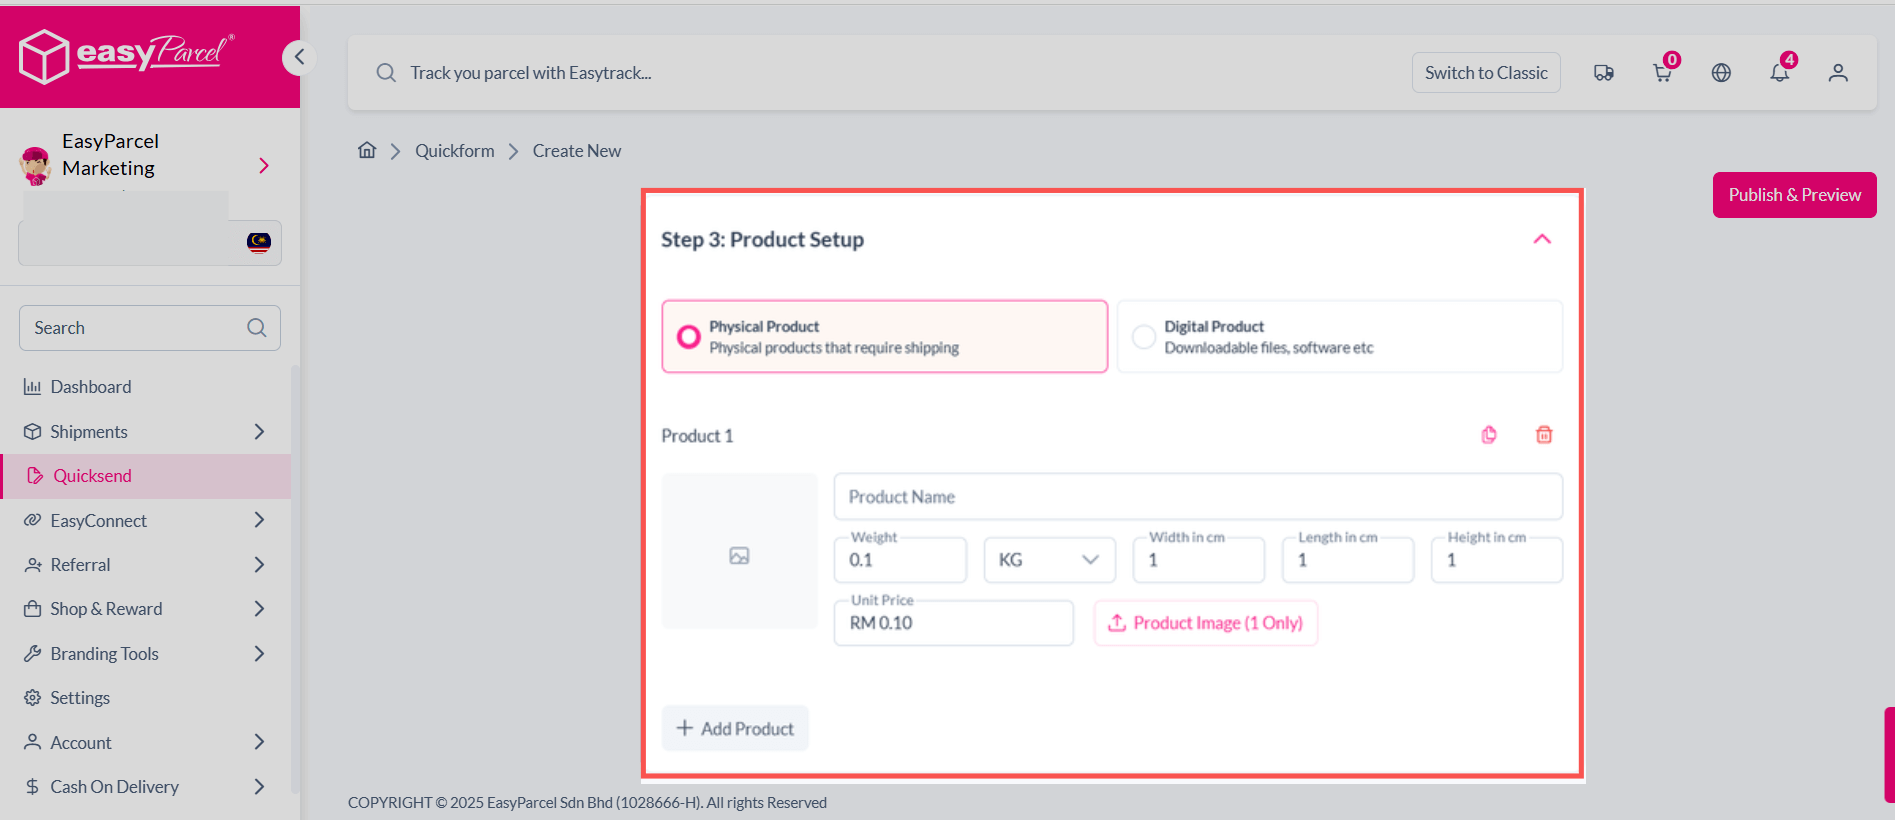
Product Setup
- Enter product name.
- Add weight, size, category & short description.
Step 6: Shipping Information
- Fill in recipient details: name, address, contact number and more because you can receive the parcel on time.
💡 Always double-check the address to avoid delivery issues.
Step 7: Payment Method
After confirming all details, click “Publish and Preview”.
- Choose your preferred payment method (e.g., online banking & e-wallet).If you select QR Payment, make sure to upload your correct QR code.
- Complete the payment to generate your Air Waybill (AWB).
💡 Print and attach the AWB securely to your parcel before sending.
With QuickSend 3.0 in your Next Gen account, parcel booking is totally stress free — it’s quick, smooth, and great for sellers. Whether you’re shipping 1 parcel or 100, this tool helps you save time.
So next time you log in to EasyParcel, give QuickSend 3.0 a try and enjoy faster, smarter shipping!
FAQ
1. Do I need to integrate my store before using QuickSend 3.0?
Yes. If you want QuickSend 3.0 to pull orders from Shopee, Lazada, or TikTok Shop, you must link your store in the Integration settings first.
2. Can I use QuickSend 3.0 without an online store?
Yes! You can still use it by entering all the product and delivery details manually.
 Singapore
 Thailand
 Indonesia