If you’re running an OpenCart store, you already know the power of having a flexible, feature-rich e-commerce platform at your fingertips. But when orders start rolling in, manually processing shipping for each one can quickly become a bottleneck.
That’s where EasyParcel comes in. By integrating your OpenCart store with EasyParcel, you can automate order imports, display real-time shipping rates at checkout, and fulfill hundreds of orders in minutes—not hours.
In this step-by-step tutorial, we’ll show you exactly how to connect OpenCart to EasyParceland set up.
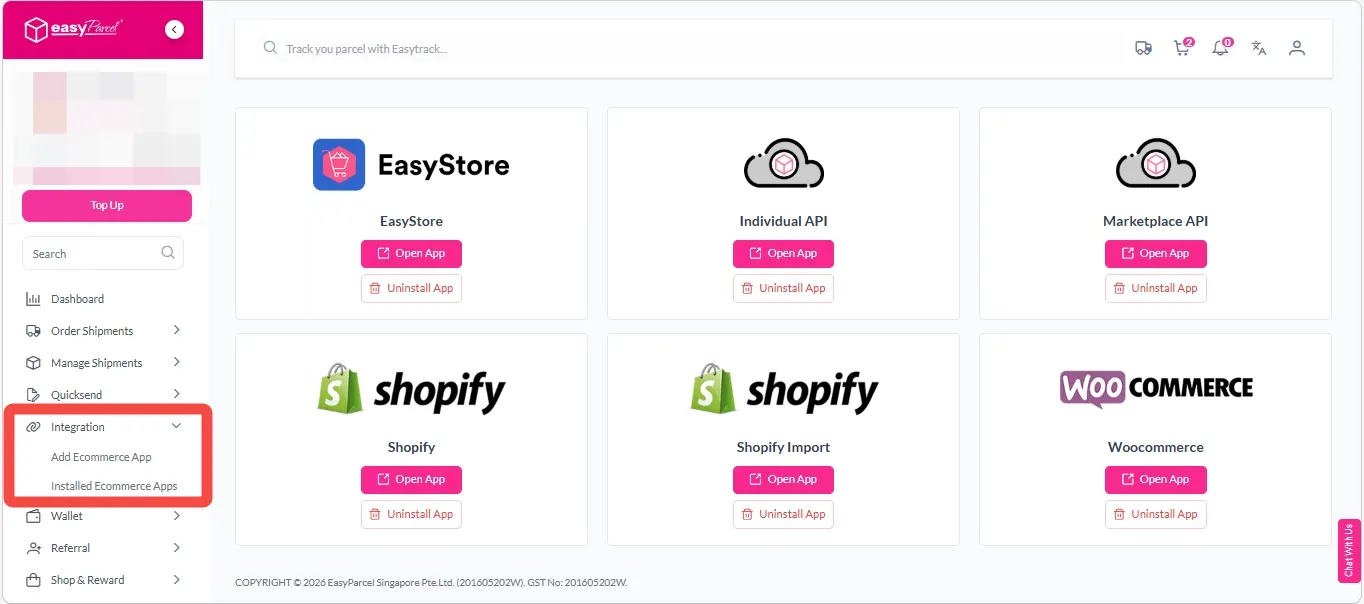
Step 1: After integration, your store will appear under ‘Integration’ → ‘Installed Ecommerce Apps’. Find the OpenCart app and click ‘Open App’ to launch it.
Step 2: The Settings page will appear on launch. You can edit your store name, enable or disable add-on services, and more. Click ‘UPDATE’ button to apply changes.
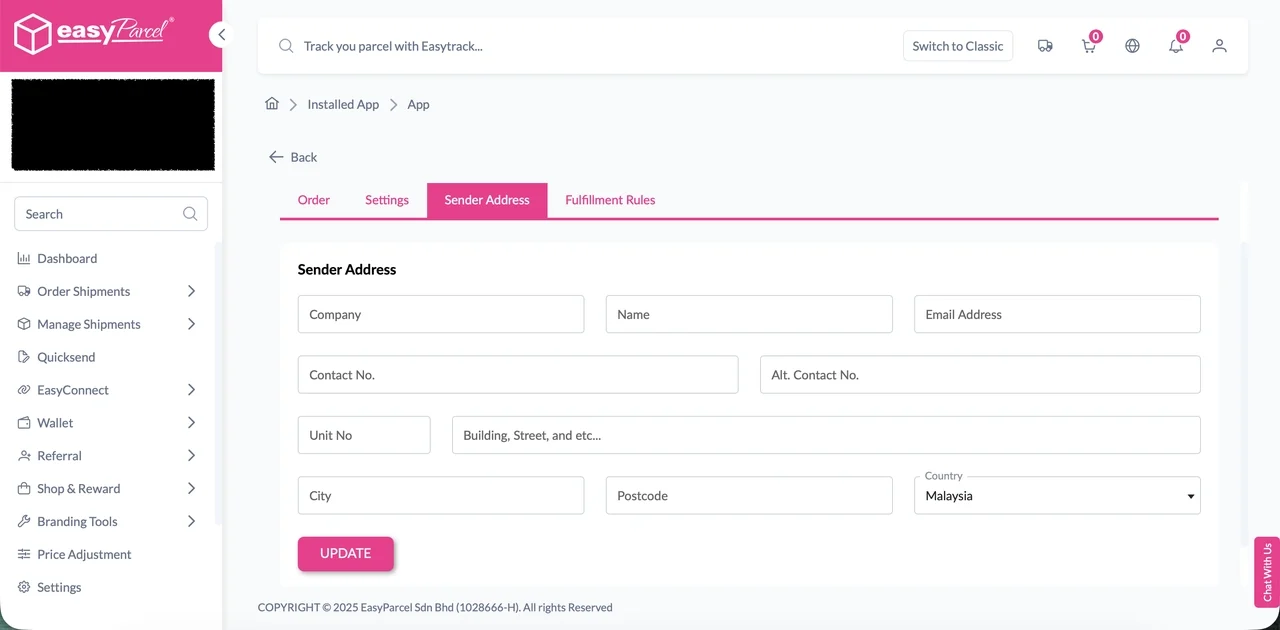
Step 3: Go to the Sender Address tab to add or modify sender details. Click ‘UPDATE’ button to save your changes.
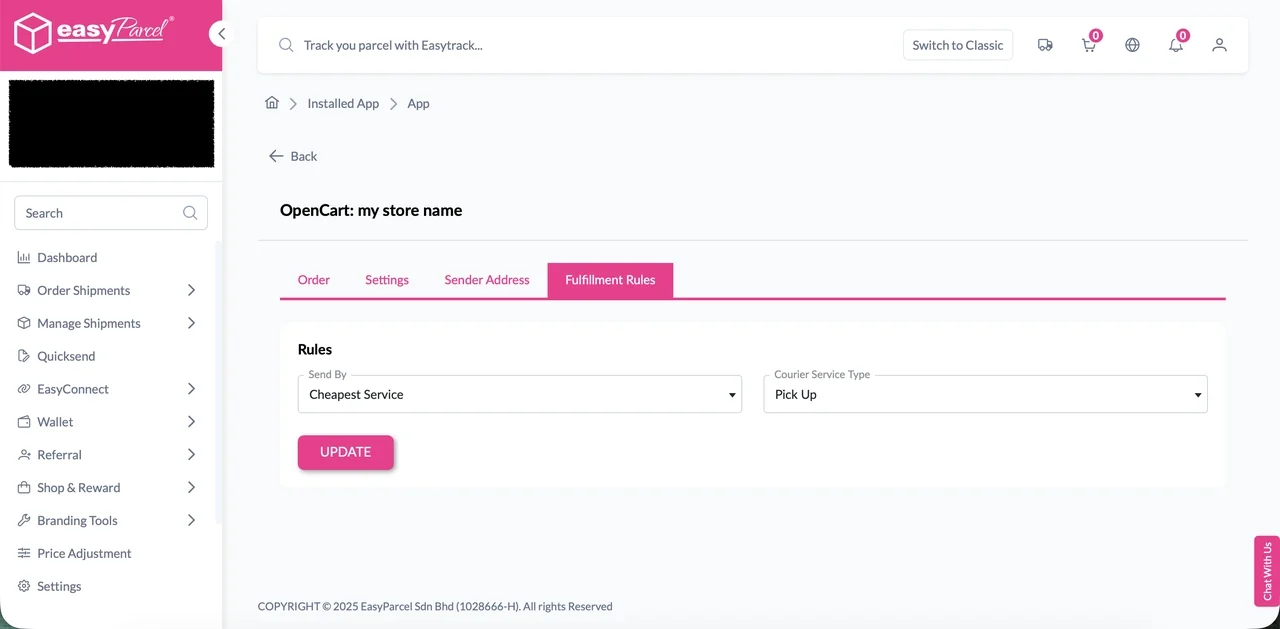
Step 4: Open the Fulfillment Rules tab to configure your preferences. Options include Send By and Courier Service Type.
How to Enable Auto Update Order Status and Tracking Info After Fulfillment
How to Enable Auto Update
Step 1: Navigate to ‘Integration’ > ‘Installed Ecommerce Apps‘, click ‘Open App’ on OpenCart App.
Step 2: In the Settings tab, scroll down to Settings section.
Step 3: Choose ‘Yes’ from the Auto order status update select list.
Step 4: A confirmation modal will be displayed. Click ‘Enable’ to enable the setting.
Step 5: Finally, click ‘Update’ to apply the changes.
Opencart Orders Fulfillment
Step 1: Go to the ‘Order’ tab, click the ‘Fulfill’ button on the order you wish to fulfill. You will be redirected to the order details page.
Step 2: On the order details page, ensure product and fulfillment details are correct, then click ‘Get Quote’ to quote list of available courier services for the order selected.
Step 3: A list of courier services will be displayed. Select your preferred courier services, apply coupons or add-on services if any. Then click ‘Proceed to Payment’ to complete the fulfillment.
Step 4: After fulfilled successfully, the order status will be changed to Shipped, and the tracking number, URL and courier name will be updated back to the fulfilled order in the OpenCart in the order history
Boost Your Rezeki with up to 500,000 Reward Points + S$2,888 Bonus Credits!
Celebrate the festive season with rewards designed to help your business grow stronger and bigger this Raya! 💚✨ With the Raya Power Boost, when you top up, you’ll earn up to S$2,888 Bonus Credits and 500,000 Reward Points, depending on your top-up amount. Don’t miss out — this exclusive Raya Power Boost runs only until 31st March 2026, 11:59PM!
Create your free account today and receive S$6 shipping coupon to start saving from your very first parcel. Compare courier rates, book in minutes, and start saving immediately.