Running a Shopify store is exciting—but manually processing orders slows you down, especially during sales spikes.
EasyParcel automates your shipping, turning a time-consuming task into a one-click operation. In this blog, will show you exactly how to import and fulfill your Shopify orders step by step.
Table of Contents
What Is EasyParcel?
EasyParcel is an all-in-one shipping platform that connects e-commerce stores to 60+ courier services including FedEx, J&T, Ninja Van, Aramex, and SingPost. Instead of managing separate accounts with each courier, you get one dashboard to compare rates, book shipments, and track deliveries.
For Shopify sellers, EasyParcel offers two integration methods:
Shopify App Version (Recommended): Enables live shipping rates at checkout, one-click bulk fulfillment, and automatic tracking notifications
Import Version: For manual batch processing of orders
Why Fulfill Shopify Orders with EasyParcel?
One Platform, All Shipments
Manage all deliveries from a single dashboard—no more switching between multiple courier websites.
Reduce Manual Work
Shopify orders sync automatically to EasyParcel. No copying addresses. No manual entry. Just click and ship.
Best & Cheapest Rates
Compare 60+ couriers side-by-side instantly to find the most affordable option for every parcel.
Free Marketing Tools
Add your store's branding to SMS, tracking pages, emails, and AWB with every delivery—at no extra cost.
Earn Reward Points
Earn points on every shipping dollar spent and redeem them for free gifts, vouchers, and exclusive rewards.
Parcel Protection
Protect your valuable parcel item with EasyParcel parcel protection, EasyCover against parcel loss.
How to Import and Fulfill Shopify Orders by Using EasyParcel?
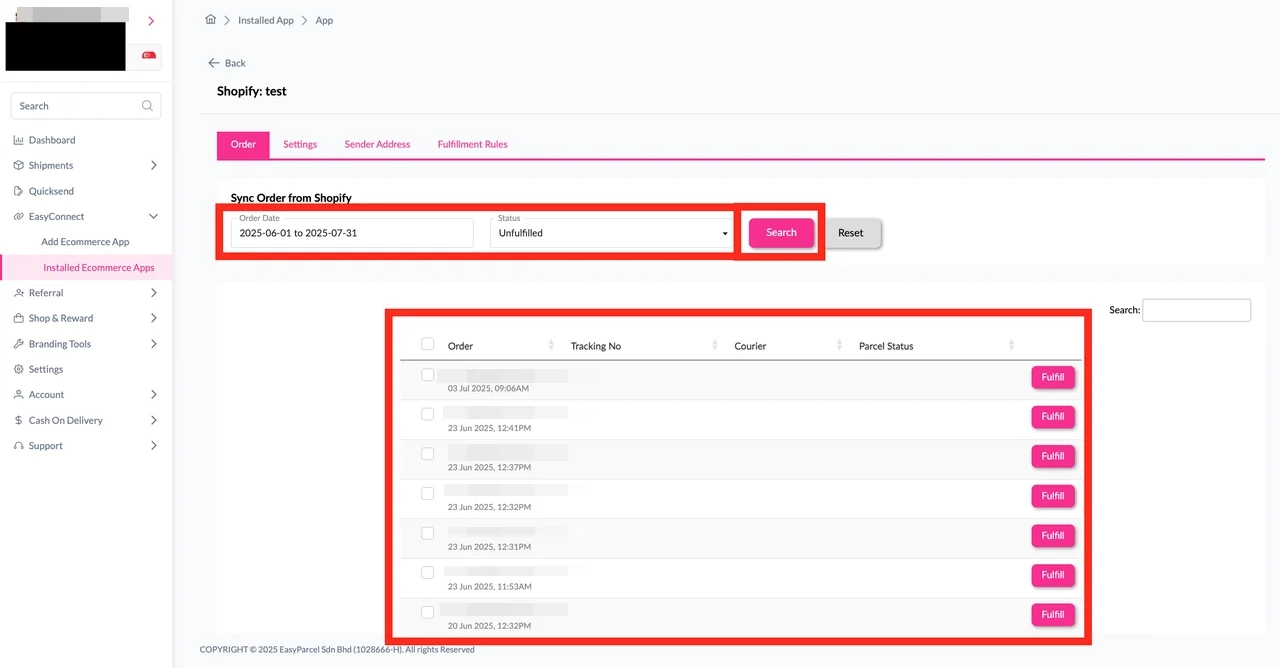
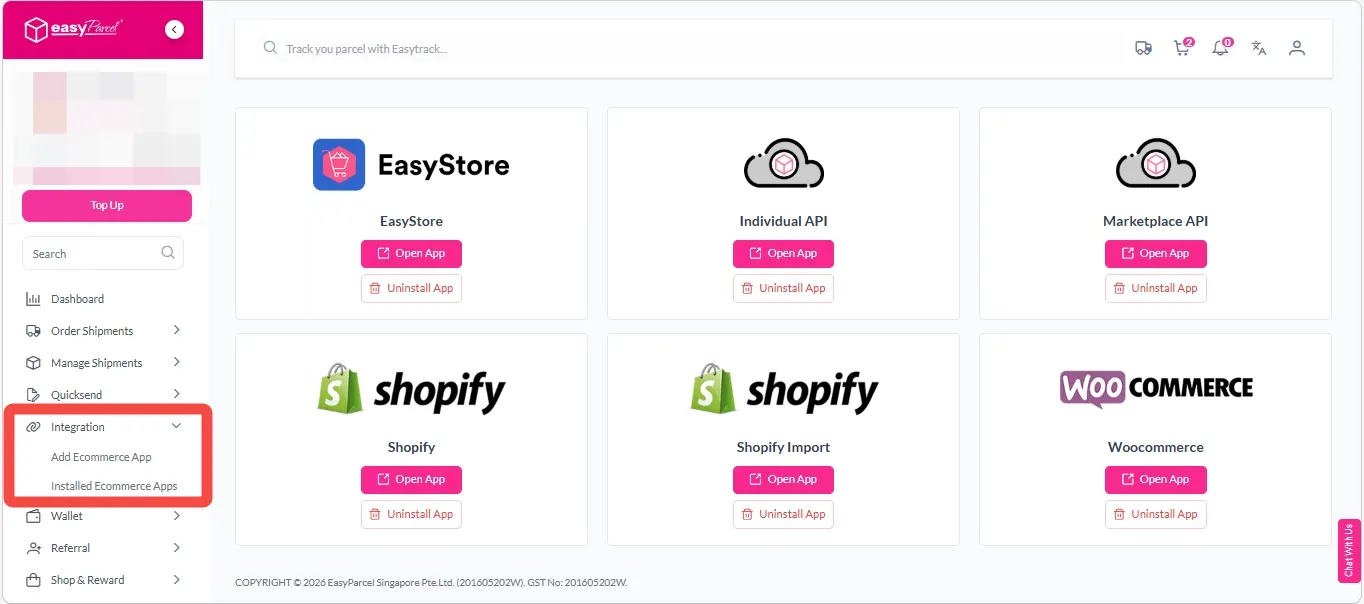
Step 1: Under “Integration“, click on “Installed Ecommerce Apps”, find “Shopify Import” and click on “Open App” button.
Click on “Order”, select the order date and order status and click on the “Search” button.
The order will be imported and shown in the list below.
Then, click the “Fulfill” button on the order you want to fulfill.
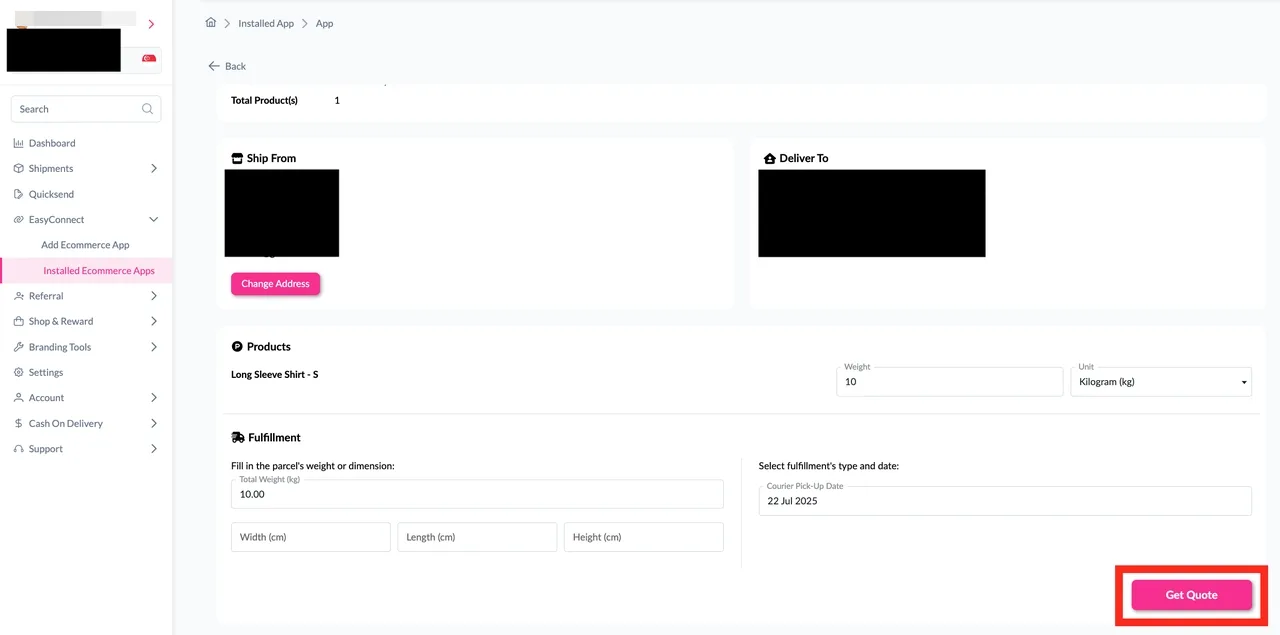
Step 2: After clicking the “Fulfill” button, you can find your order details and click on the “Get Quote” button.
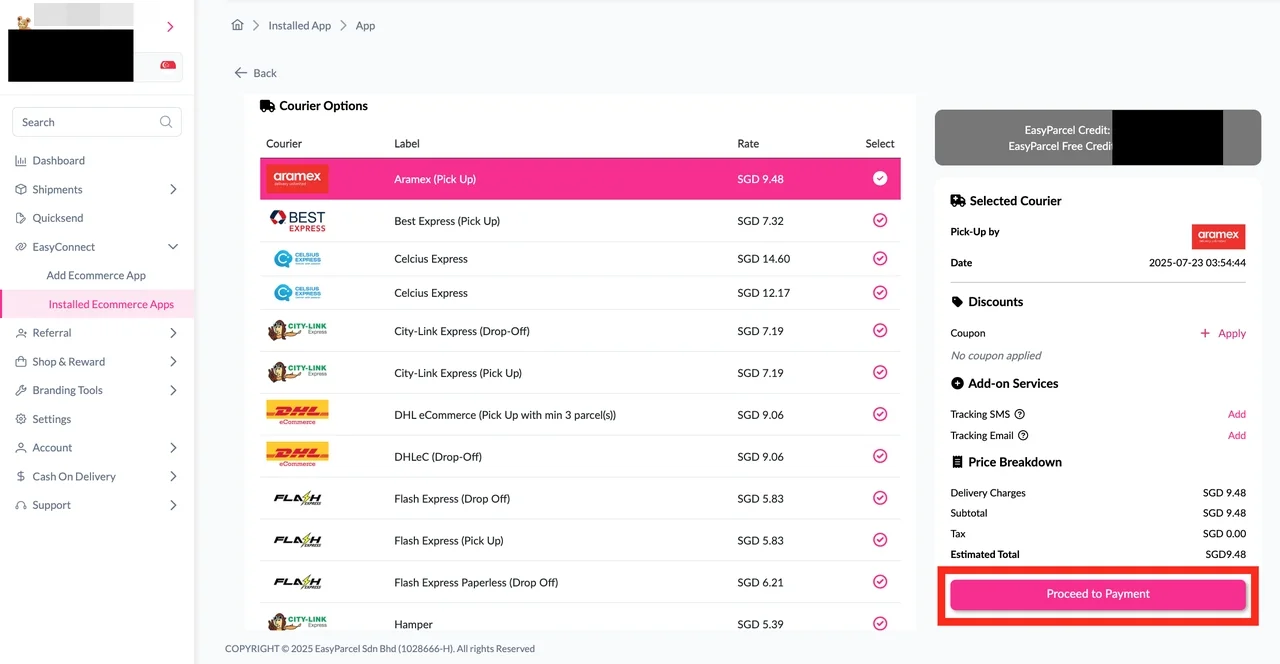
Step 3: Choose the preferred courier option and click on the “Proceed to Payment” button.
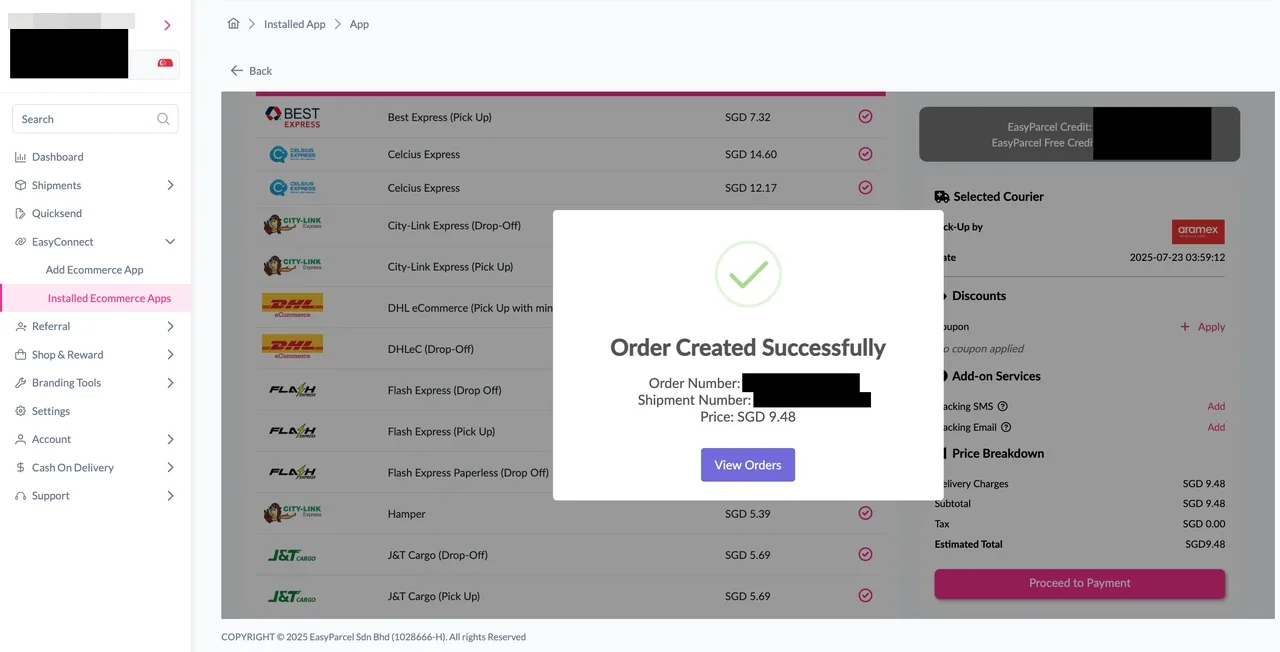
Step 4: The order status, order number, shipment number, and price will be displayed. Click on the “View Orders” button.
Step 5: The fulfilled order will now be displayed on the Order Page. Click on the “Details” button.
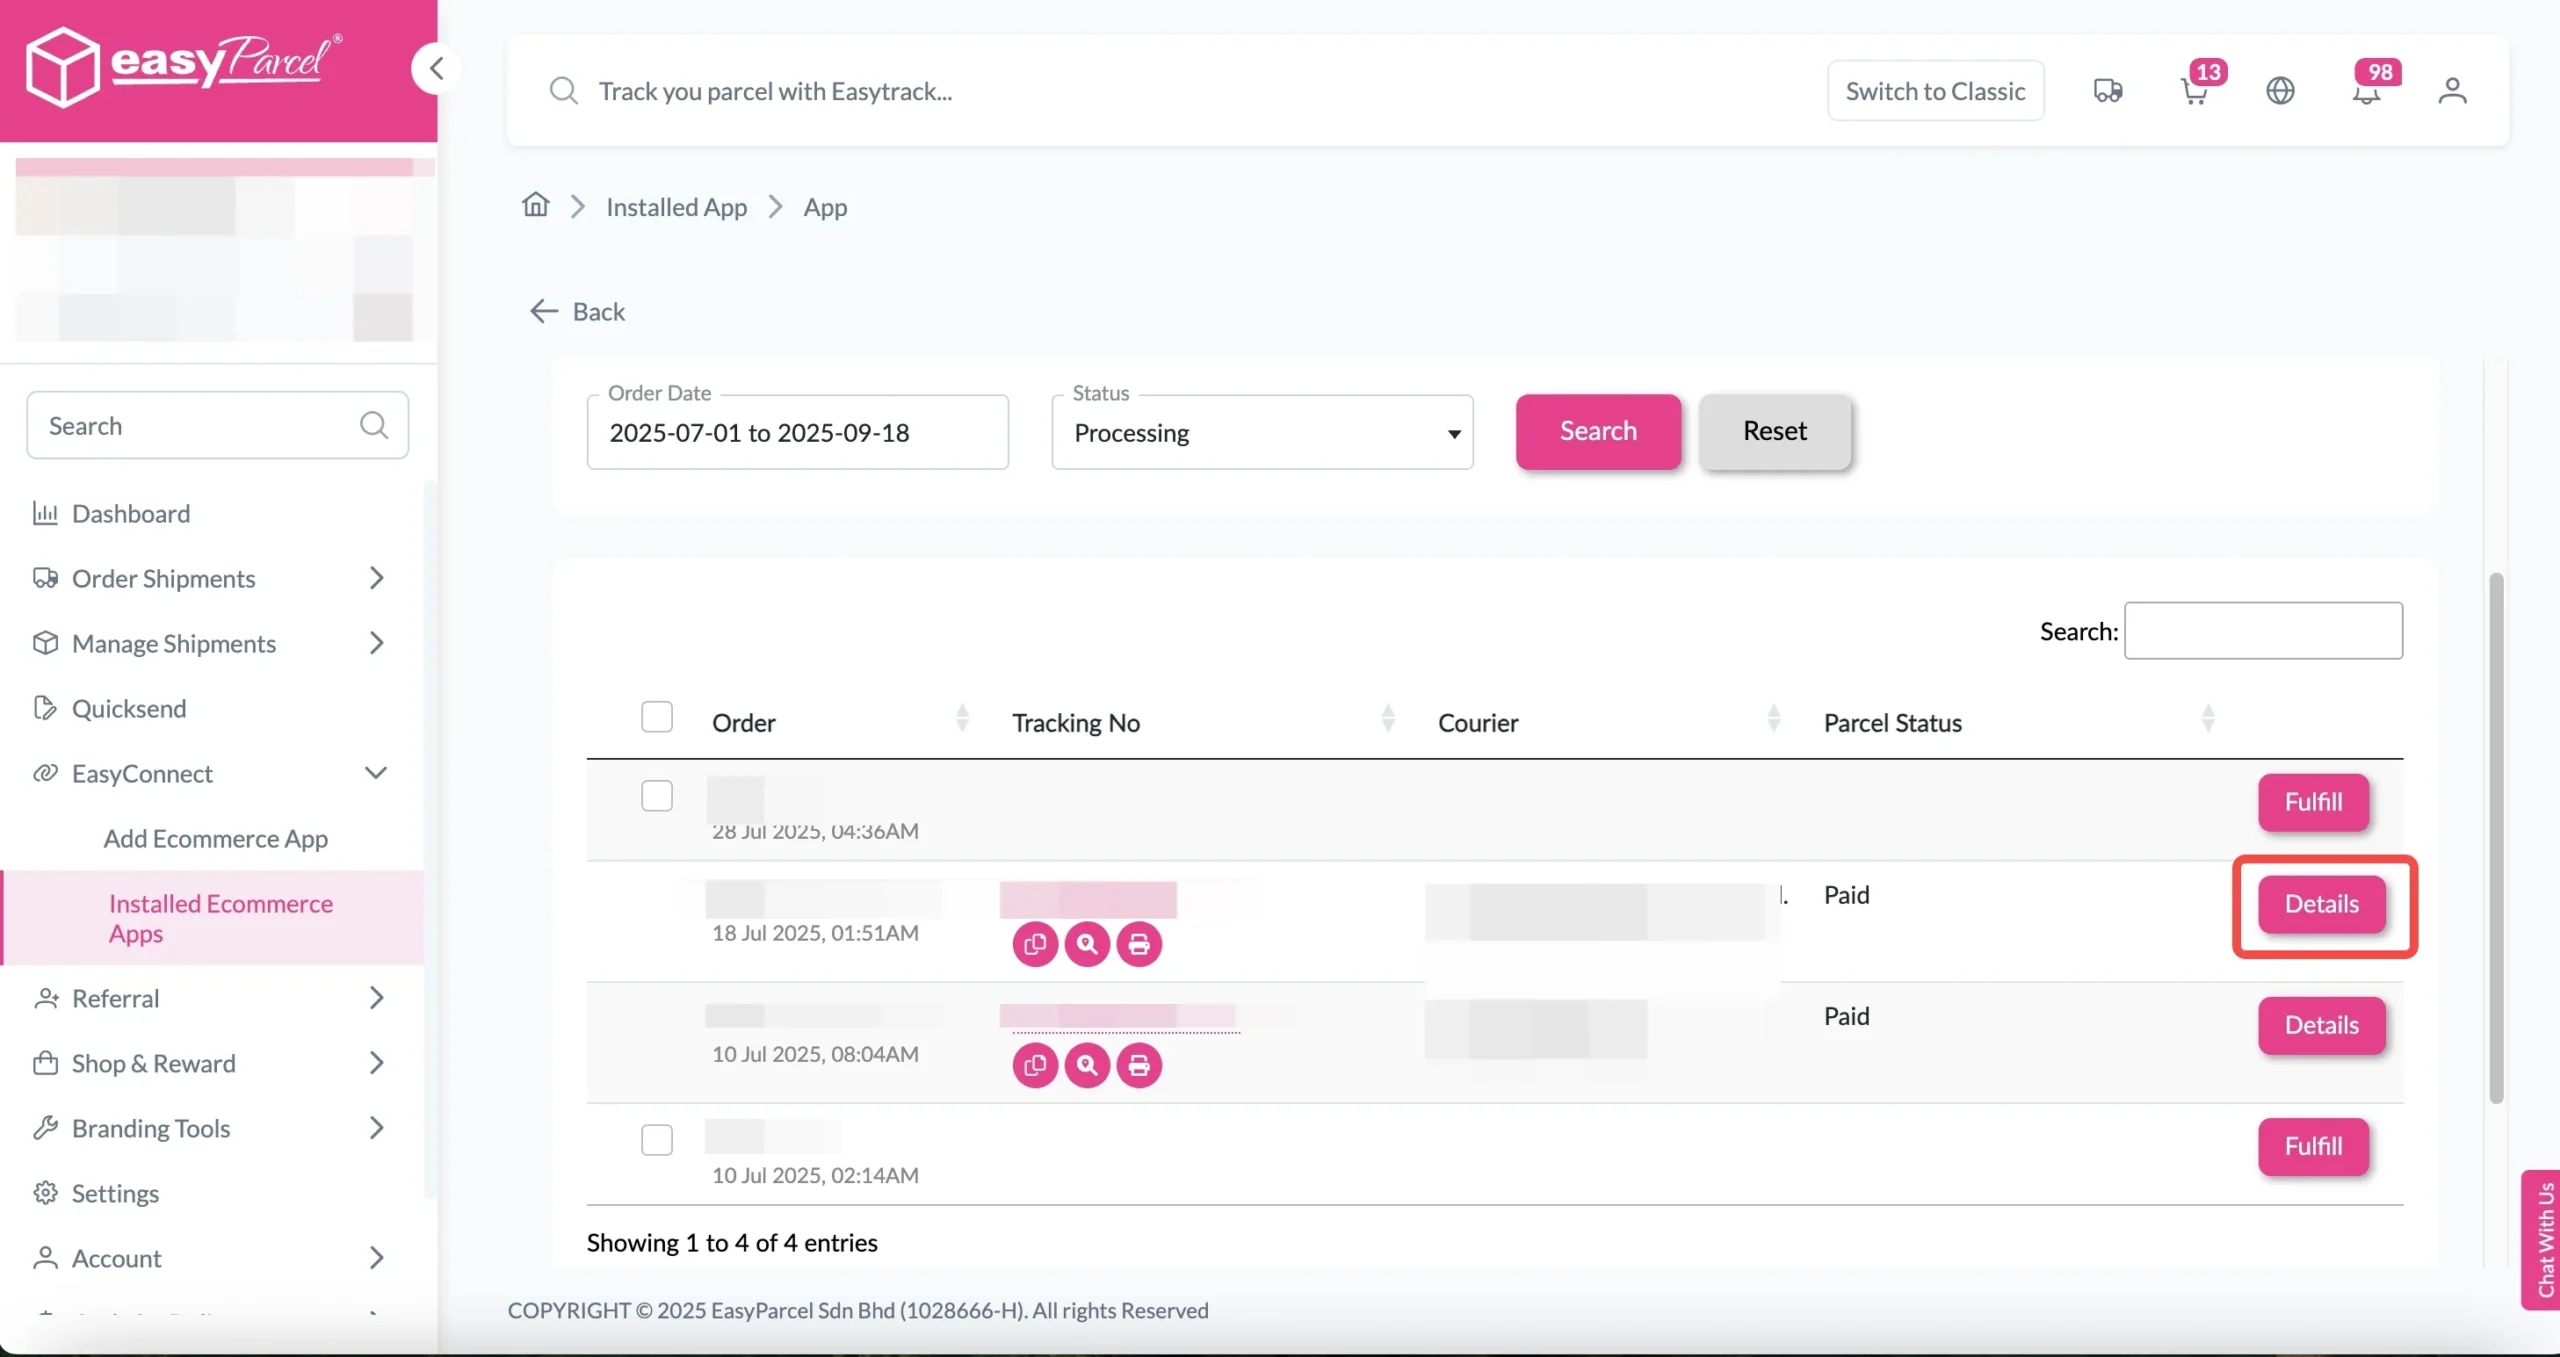
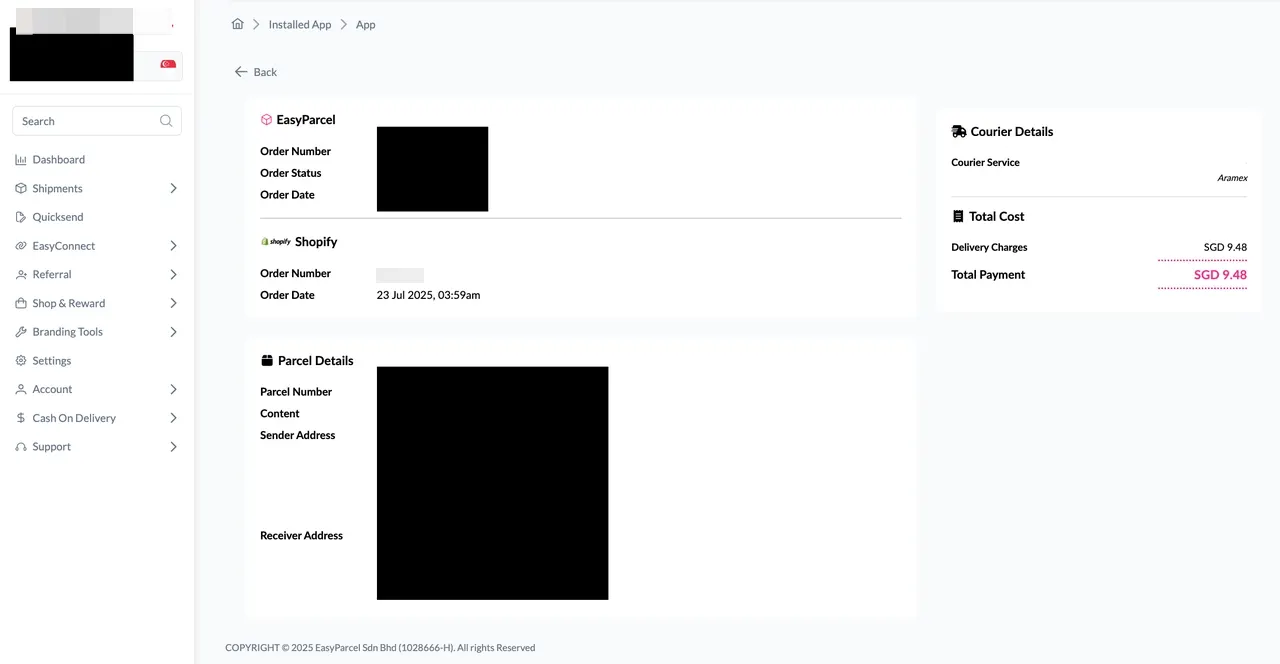
Step 6: Order details will be displayed on the page.
How to Enable Auto Update Order Status and Tracking Info After Fulfillment
How to Enable Auto Update
Step 1: Navigate to “Integration” > “Installed Ecommerce Apps”, click “Open App” on Shopify app.
Step 2: In the “Settings” tab, scroll down to Settings section.
Step 3: Choose “Yes” from the “Auto order status update” select list.
Step 4: Click “Enable” to enable the setting.
Step 5: Finally, click “Update” to apply the changes.
Fulfillment
Step 1: Go to the “Order” tab, click the “Fulfill” button on the order you wish to fulfill. You will be redirected to the order details page.
Step 2: On the order details page, ensure product and fulfillment details are correct, then click “Get Quote” to quote list of available courier services for the order selected.
Step 3: A list of courier services will be displayed. Select your preferred courier services, apply coupons or add-on services if any. Then click “Proceed to Payment” to complete the fulfillment.
Step 4: After fulfilled successfully, the order status will be changed to Fulfilled, and the tracking number, URL and courier name will be updated back to the fulfilled order in the Shopify.